With my WordPress instance set up and MySQL database hosted in a separate RDS instance, I’m poised to take my website to the next level by leveraging AWS Lightsail load balance to distribute traffic across multiple instances. This guide walks through the process of setting up a load balancer, ensuring seamless traffic distribution for enhanced performance and reliability
Setting up the Load Balancer:
- Navigate to the AWS Lightsail dashboard and access the “Networking” section. Click on “create load balancer.”
- Choose the location for your load balancer and assign it a name. Click on the “create load balancer” button to proceed.
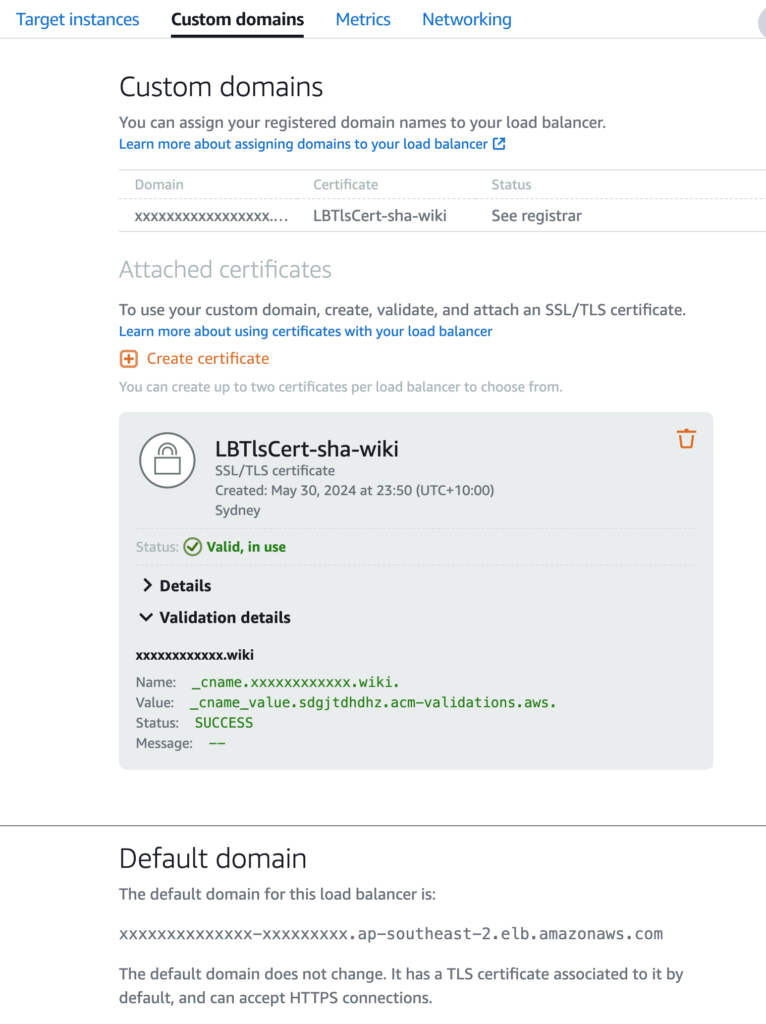
- Inside the newly created load balancer instance, head to “Custom domains” tab.
- Create a certificate by providing a name and specifying the domain name for which you want to generate the certificate.
- Once the certificate is created, follow the prompts to set up the CNAME for certificate validation. Note: If using Lightsail Domain and DNS, this process is automated.
- After a brief period, you’ll be able to attach the certificate to the load balancer.
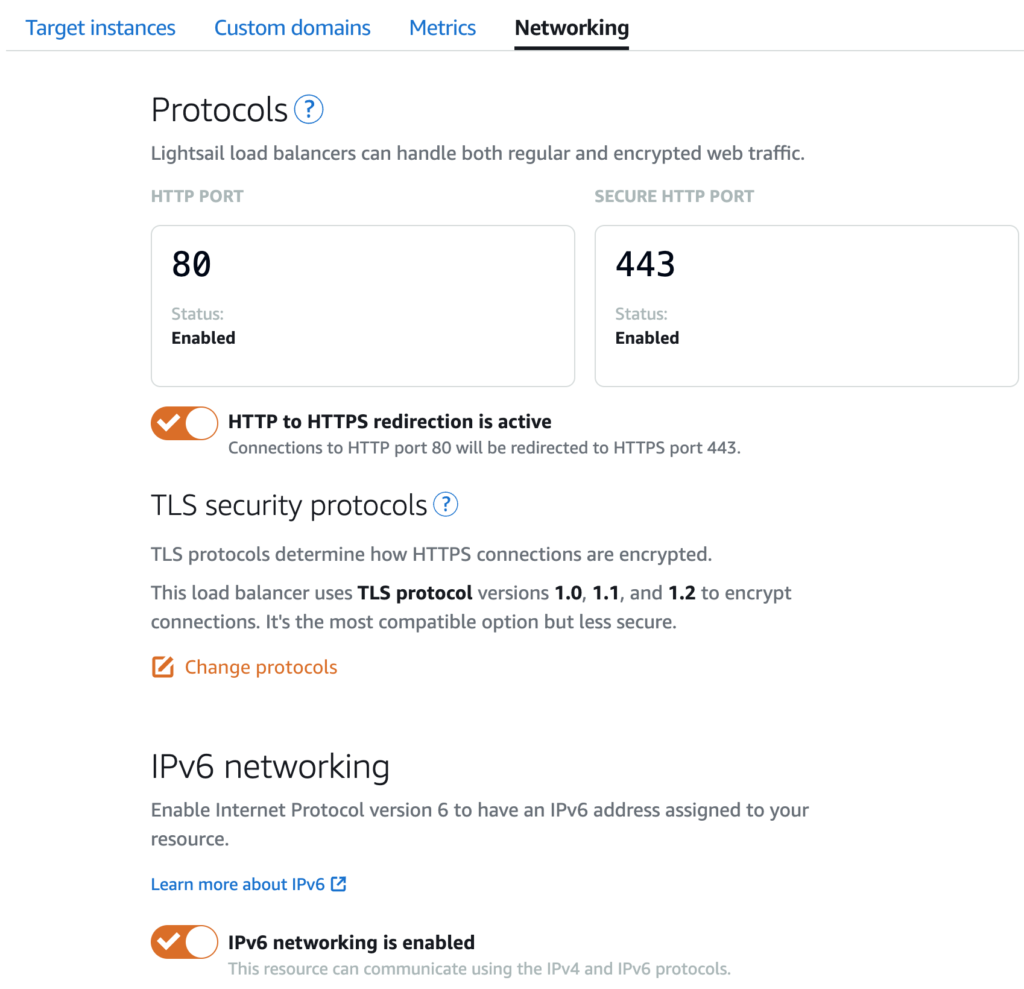
- In the “Networking” tab, enable HTTP to HTTPS redirection.
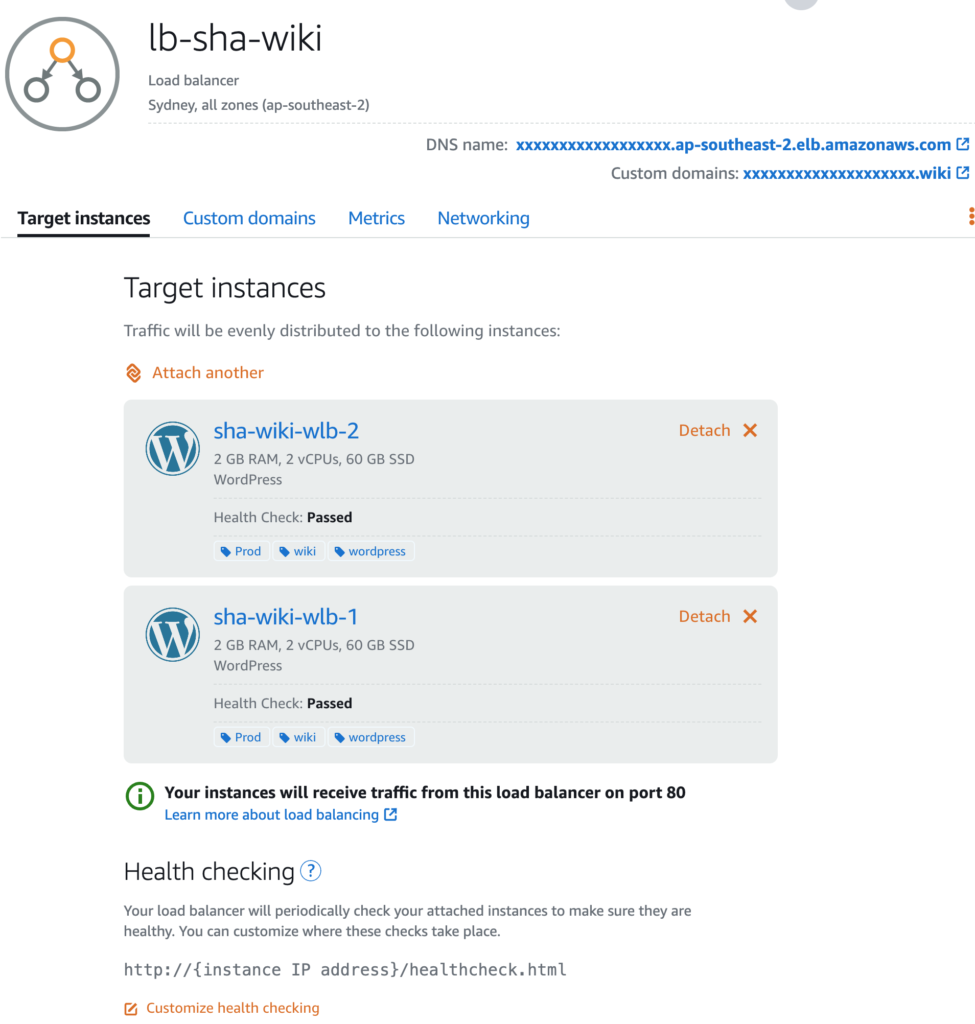
- Proceed to the Target instance section and attach Lightsail web instances to the load balancer.
- Add Health checking by adding a simple html file in root directory. add the file name to health check section
$ touch /opt/bitnami/wordpress/healthcheck.htmlRedirect Errors Troubleshooting:
Encountering “Too many redirect errors” can be frustrating. In my case, this issue stemmed from conflicting setups involving Bitnami WordPress certificates and load balancer networking configurations.
Steps to Resolve Redirect Errors:
- Run the Bitnami certificate tool with DNS validation turned off:
$ sudo /opt/bitnami/bncert-tool --perform_dns_validation 0- Follow the prompts to complete the process and assign self-signed certificates to all instances.
- Restart the instances to apply the changes, allowing the web pages to appear on the load balancer’s default domain.
Finalising Traffic Distribution:
Once the setup is verified and the web pages are rendering correctly, it’s time to channel all traffic to the load balancer instances.
- Copy the Custom domain from the load balancer’s Custom domain tab.
- Paste this domain into your browser and verify that the pages render correctly.
- Update the DNS A record to point to the load balancer domain, directing incoming traffic to the load-balanced instances.
Conclusion
By implementing AWS Lightsail Load Balancer and fine-tuning DNS settings, I’ve optimised my WordPress website for scalability and reliability. With traffic evenly distributed across multiple instances, I can confidently handle increased visitor loads while ensuring a seamless browsing experience.


Leave a Comment