
Setting up Home Assistant on a Raspberry Pi 5 with an NVMe SSD involves a two-step process. First, we use an SD card to update the firmware, then install Home Assistant on the SSD.
Step 1: Prepare the Raspberry Pi 5 Hardware
1. Prepare the SD Card:
- Insert the SD card into your computer.
- Use Raspberry Pi Imager to write Raspberry Pi OS (Raspbian) to the SD card.
- In Raspberry Pi Imager, open the advanced options to configure:
- SSH username and password.
- WiFi credentials (if using WiFi; otherwise, use Ethernet as I did).
- Eject the SD card and insert it into the Raspberry Pi.

2. Boot Raspberry Pi 5 from SD Card:
- Connect the power adapter to the Raspberry Pi.
- Wait a few minutes for it to boot up and connect to the network.
- Use your router’s interface to find the device’s IP address.
- Use an SSH client to connect to the Raspberry Pi:
ssh <your-username>@<raspberry-pi-ip>- Update the OS to the latest version:
sudo apt update && sudo apt full-upgrade -y- Upgrade the Raspberry Pi 5 firmware:
sudo rpi-eeprom-update- Ensure the NVMe SSD is detected:
lsblk
ls -l /dev/nvme*- Enable VNC to access the Raspberry Pi OS remotely:
sudo raspi-config
(Navigate to Interface Options > VNC and enable it.)
Note: If you have a monitor, keyboard, and mouse connected, you can complete these steps using the graphical interface.
Step 2: Install Home Assistant on NVMe SSD
1. Access the Raspberry Pi Remotely:
- Use any VNC client to connect using the same SSH username and password.
- Open the Start Menu and launch Raspberry Pi Imager.
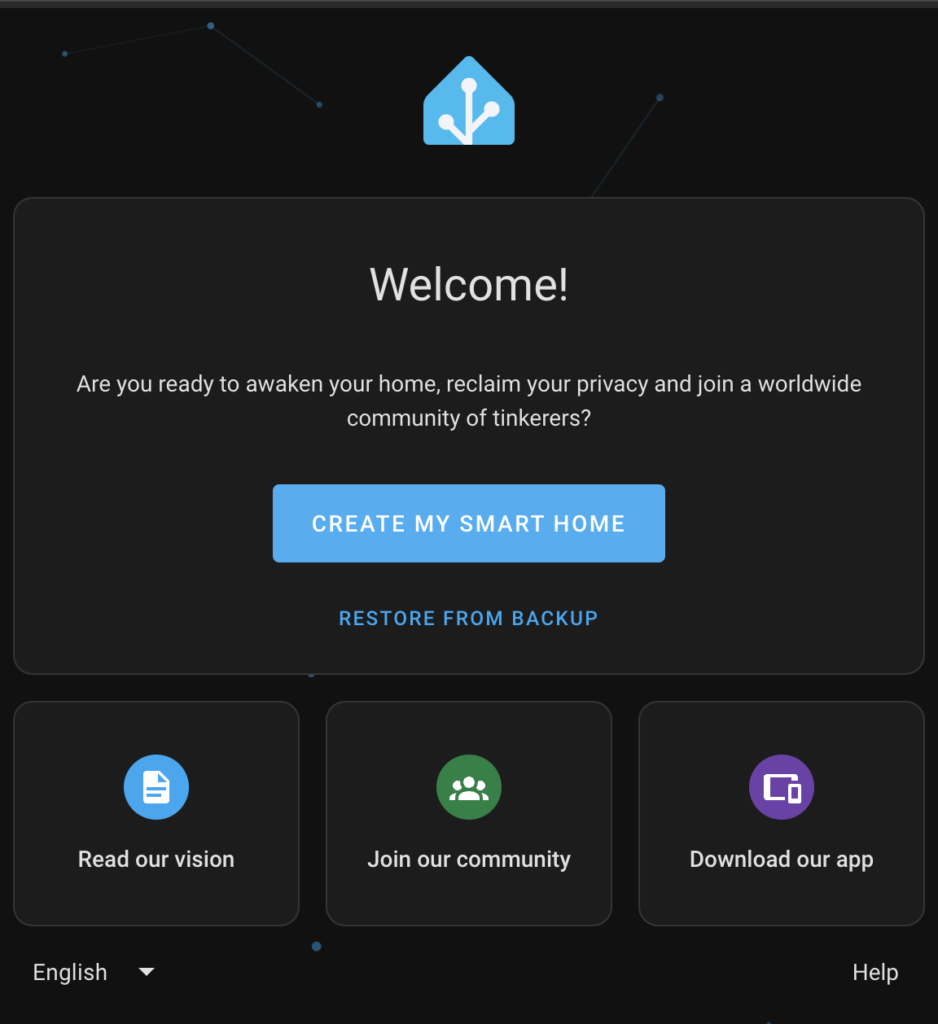
- Select the latest Home Assistant OS as the operating system.
- Choose the NVMe SSD as the storage device.
- Write Home Assistant to the SSD.
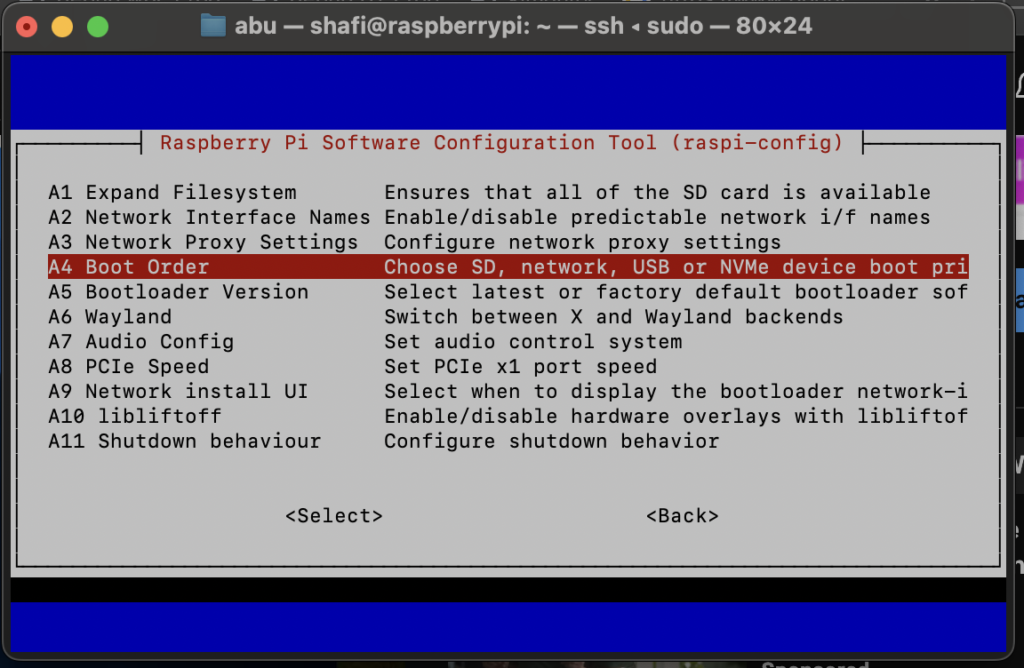
2. Change Boot Order:
- Open the Raspberry Pi configuration tool:
sudo raspi-config- Navigate to Advanced Options > Boot Order > NVMe/USB Boot and select it.
- Shut down the device:
sudo shutdown now- Remove the SD card.
Step 3: Boot and Configure Home Assistant OS
- Power on the Raspberry Pi, ensuring the NVMe SSD is connected.
- Wait for Home Assistant OS to boot up.
- Access Home Assistant from your web browser:
http://homeassistant.local:8123- Complete the initial Home Assistant setup.
Conclusion
By following these steps, you have successfully set up Home Assistant on a Raspberry Pi 5 with an NVMe SSD. This setup ensures faster performance and improved reliability compared to using an SD card. Enjoy automating your smart home!
Other commands and error
sudo apt update && sudo apt full-upgrade$ sudo rpi-eeprom-update
Segmentation fault $ sudo rpi-eeprom-update
BOOTLOADER: up to date
CURRENT: Mon 23 Sep 13:02:56 UTC 2024 (1727096576)
LATEST: Mon 23 Sep 13:02:56 UTC 2024 (1727096576)
RELEASE: default (/lib/firmware/raspberrypi/bootloader-2712/default)
Use raspi-config to change the release.$ lspci
0000:00:00.0 PCI bridge: Broadcom Inc. and subsidiaries BCM2712 PCIe Bridge (rev 21)
0000:01:00.0 PCI bridge: ASMedia Technology Inc. ASM1182e 2-Port PCIe x1 Gen2 Packet Switch
0000:02:03.0 PCI bridge: ASMedia Technology Inc. ASM1182e 2-Port PCIe x1 Gen2 Packet Switch
0000:02:07.0 PCI bridge: ASMedia Technology Inc. ASM1182e 2-Port PCIe x1 Gen2 Packet Switch
0001:00:00.0 PCI bridge: Broadcom Inc. and subsidiaries BCM2712 PCIe Bridge (rev 21)
0001:01:00.0 Ethernet controller: Raspberry Pi Ltd RP1 PCIe 2.0 South Bridge$ lsblk
NAME MAJ:MIN RM SIZE RO TYPE MOUNTPOINTS
mmcblk0 179:0 0 7.4G 0 disk
├─mmcblk0p1 179:1 0 512M 0 part /boot/firmware
└─mmcblk0p2 179:2 0 6.9G 0 part /$ ls -l /dev/nvme*
crw------- 1 root root 245, 0 Jan 31 11:17 /dev/nvme0
brw-rw---- 1 root disk 259, 0 Jan 31 11:17 /dev/nvme0n1$ lsblk
NAME MAJ:MIN RM SIZE RO TYPE MOUNTPOINTS
mmcblk0 179:0 0 7.4G 0 disk
├─mmcblk0p1 179:1 0 512M 0 part /boot/firmware
└─mmcblk0p2 179:2 0 6.9G 0 part /
nvme0n1 259:0 0 465.8G 0 disk Change boot order
sudo raspi-config
Advanced Options > Boot order > NVMe/USB Boot
Setting up util-linux (2.38.1-5+deb12u3) ...
fstrim.service is a disabled or a static unit not running, not starting it.
dpkg: unrecoverable fatal error, aborting:
 unable to fsync updated status of 'util-linux': Input/output error
E: Sub-process /usr/bin/dpkg returned an error code (2)
E: Sub-process dpkg --set-selections returned an error code (100)
E: Couldn't revert dpkg selection for approved remove/purge after an error was encountered!
W: Problem unlinking the file /var/cache/apt/pkgcache.bin - pkgDPkgPM::Go (5: Input/output error)
E: Problem executing scripts DPkg::Post-Invoke '/usr/bin/test -e /usr/share/dbus-1/system-services/org.freedesktop.PackageKit.service && /usr/bin/test -S /var/run/dbus/system_bus_socket && /usr/bin/gdbus call --system --dest org.freedesktop.PackageKit --object-path /org/freedesktop/PackageKit --timeout 4 --method org.freedesktop.PackageKit.StateHasChanged cache-update > /dev/null; /bin/echo > /dev/null'
E: Sub-process returned an error code


Leave a Comment